
FAQ: SERIAL COMMUNICATION LINK SETUP & FAULT DIAGNOSIS
For Autronic ECUs equipped with a RS232 Serial communication port, a serial communication port equipped PC running Autronic PC software is required for calibration, diagnosis and data retrieval. Reliable communication is only possible when the software is directed to use a correctly configured serial communication port and this communication port is correctly connected to the ECU serial port. The PC serial communication port can be a built-in type (when available) or added to the PC by installing a USB to Serial adaptor (see note 1).
If the Autronic PC software fails to automatically establish communications with your Autronic ECU, the following procedure should resolve the problem (also see note 2).
1. DETERMINE THE COMMUNICATION PORT NUMBER
If the Autronic PC software fails to automatically establish communications with your Autronic ECU, the following procedure should resolve the problem (also see note 2).
1. DETERMINE THE COMMUNICATION PORT NUMBER
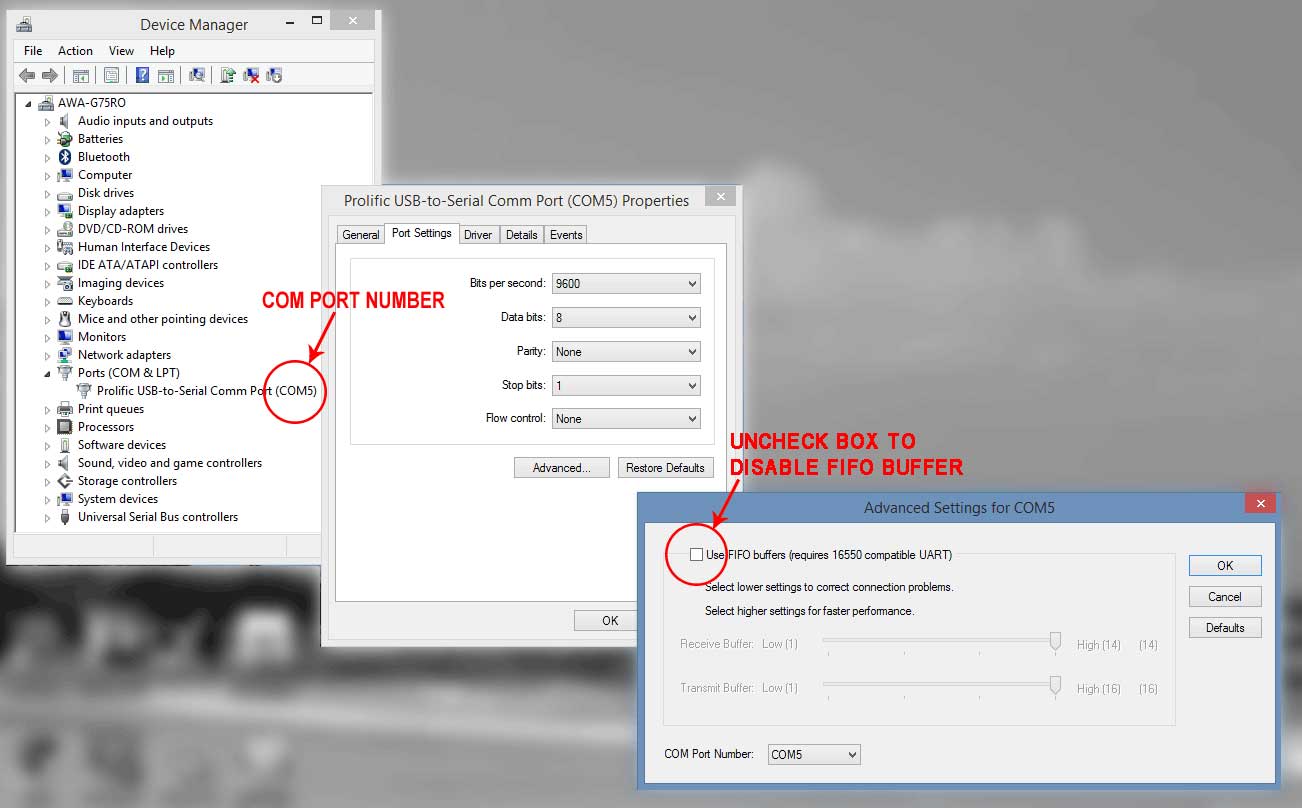
Use the computers “Device Manager” screen to confirm the presence of an installed Serial communication port. More than one communication port may be available. Note the number of the port that you intend to use, so that the Autronic software can be set accordingly. The example shows one available com port, COM5.
(For SMC/SM2 ECU family software, only communication port numbers below 11 are supported. If the com port number is outside this allowed range, click on the chosen port to open its port properties screen. Select the “Port Settings” tab, then click on the ”advanced” button. In the “Advanced Settings” window, select an unused com port number less than 11.)
(For SMC/SM2 ECU family software, only communication port numbers below 11 are supported. If the com port number is outside this allowed range, click on the chosen port to open its port properties screen. Select the “Port Settings” tab, then click on the ”advanced” button. In the “Advanced Settings” window, select an unused com port number less than 11.)
If the connection is not established and the following popup error box appears, move the cursor down (using “DOWN ARROW”) to “Try another port” and push the “ENTER” key to open the Port Selection screen.
In the Port Selection screen use the “UP & DOWN ARROW” and “ENTER” keys to select the port number determined in step 1 above (e.g.: COM5)
If the serial port has been configured correctly and the Autronic ECU software is set for the correct com port number, and communication cannot be established, either of the two error conditions are possible.
4.1 COMMUNICATION LINK IS BROKEN
4.1 COMMUNICATION LINK IS BROKEN
For the “Short circuit detected in data link” error popup window perform the following test:
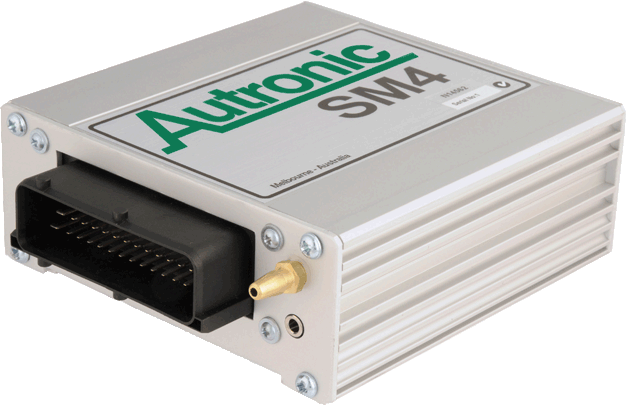
Disconnect the 3.5mm Data link cable connector from the ECU. If error message popup box changes to “Cannot find an ECU. Check data link”, then the ECU or its Serial communication socket is most likely at fault. If the error persists disconnect the Data link cable from the PC serial port. If error message popup box changes to “Cannot find an ECU. Check data link” then the most likely cause is a faulty data link cable. If the error persists then the Serial communication port is faulty or has been configured in loopback mode (i.e.: internally returns any data output)
Disconnect the 3.5mm Data link cable connector from the ECU. If error message popup box changes to “Cannot find an ECU. Check data link”, then the ECU or its Serial communication socket is most likely at fault. If the error persists disconnect the Data link cable from the PC serial port. If error message popup box changes to “Cannot find an ECU. Check data link” then the most likely cause is a faulty data link cable. If the error persists then the Serial communication port is faulty or has been configured in loopback mode (i.e.: internally returns any data output)

For the “Cannot find an ECU. Check data link” error popup window perform the following tests:
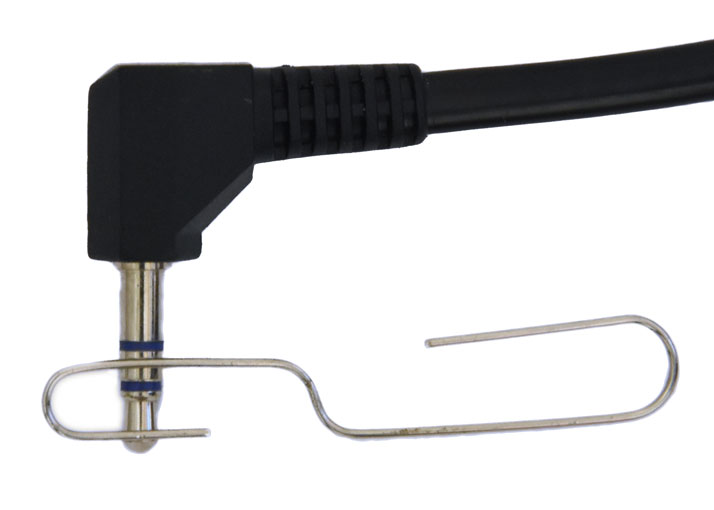
Disconnect the 3.5mm Data link cable connector from the ECU and then temporarily short the middle contact to the tip contact using a piece of wire or paperclip. If the popup error box changes to “Short circuit detected in data link” then the ECU is either unpowered or faulty, or its Serial communication socket is faulty or the software being used is incompatible with the ECU. Or the Data link ground connection is broken.
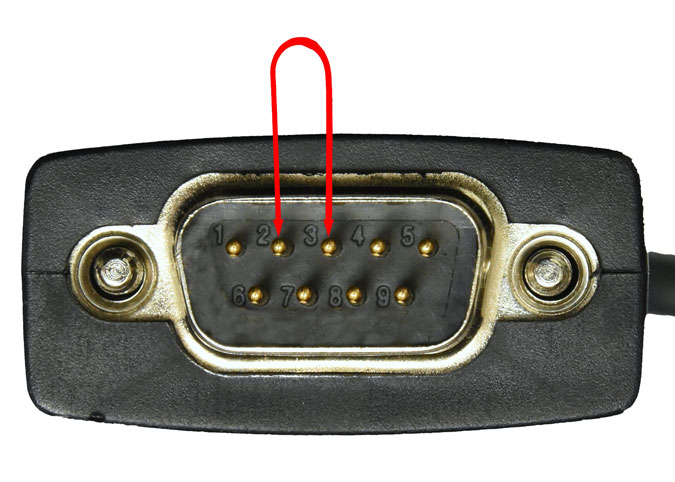
If the error persists disconnect the Data link cable from the PC serial port and temporarily short the serial port connector pins 2 & 3 together with a metal screw driver blade or piece of wire. If error message popup box changes to “Short circuit detected in data link”, then the most likely cause is a faulty data link cable. If the error persists then the wrong com port number has been selected, or the selected Serial communication port is faulty or has been incorrectly installed.
If shorting the 3.5mm cable connector middle and tip contacts together produced a “Short circuit detected in data link” message add an additional short circuit to the body of the connector (ie: simultaneously short all 3 contacts of the 3.5mm plug together). If this does not cause the message to revert back to “Cannot find an ECU. Check data link” then the Ground wire of the data link cable is broken.
If shorting the 3.5mm cable connector middle and tip contacts together produced a “Short circuit detected in data link” message add an additional short circuit to the body of the connector (ie: simultaneously short all 3 contacts of the 3.5mm plug together). If this does not cause the message to revert back to “Cannot find an ECU. Check data link” then the Ground wire of the data link cable is broken.
3. CONFIGURE THE AUTRONIC SOFTWARE
Connect the ECU to PC serial data link cable, power-up the ECU and run the Autronic software. If the connection is not automatically established and no popup boxes appear, push the “F3” to initiate communication. If the following popup box is visible, use “DOWN ARROW” key to highlight “Go on line” then push the “ENTER” key.
2. CONFIGURE THE COMMUNICATION PORT
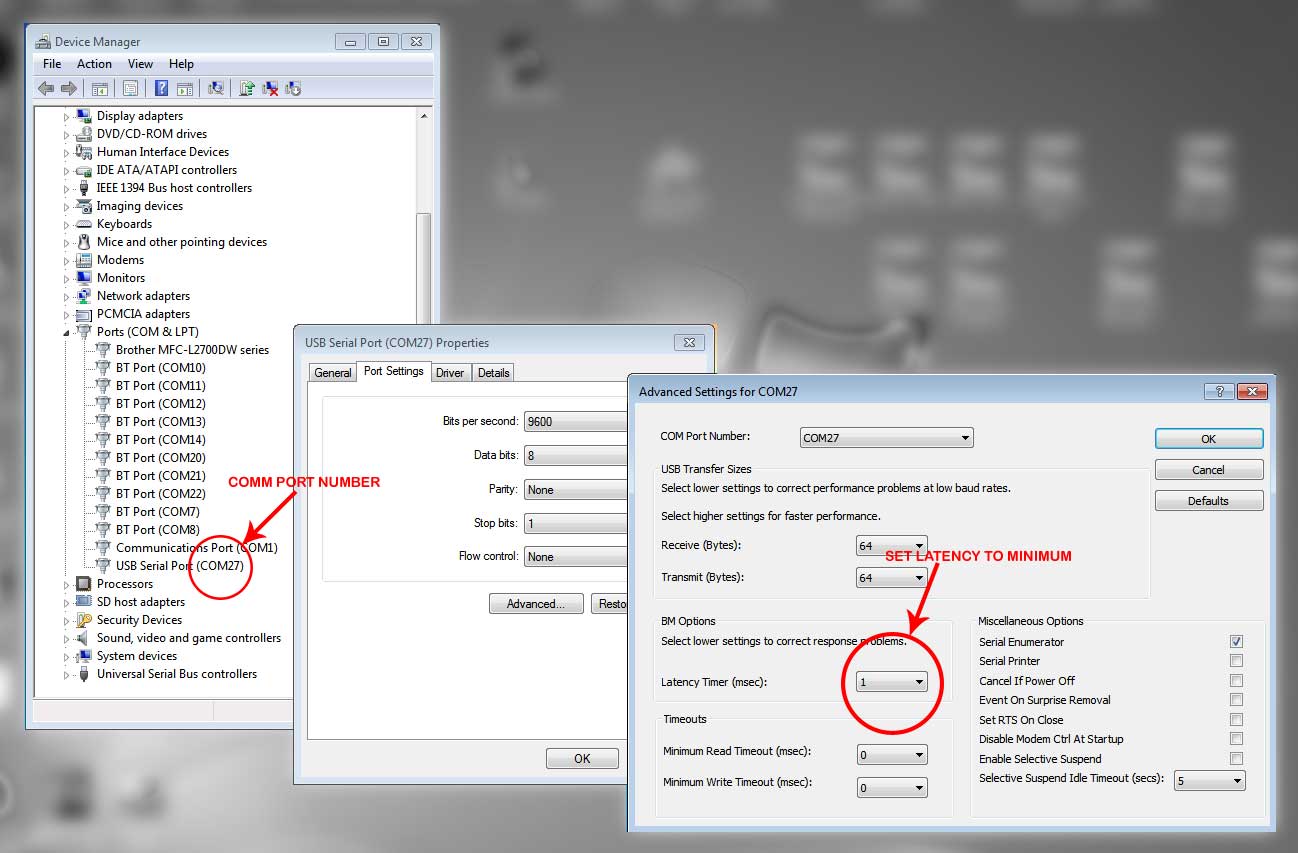
Communication performance will be slow and/or unreliable if large FIFO buffer or long latency time settings are used. In the computers “Device Manager” screen, click on “Ports (COM & LPT)” to display the available ports, then click on the chosen port (COM5 in the example) to open its port properties screen. Select the “Port Settings” tab, then click on the ”advanced” button. One of the following two screens variants will be seen. Use the circled item setting of the relevant Advanced Settings window.
If after port selection, the connection is not automatically established, try restarting the Autronic software. If still unsuccessful, see item 4 below.
4. DIAGNOSE SERIAL CONNECTION LINK
4.2 COMMUNICATION LINK IS SHORT CIRCUITED
1.
If a USB to Serial adaptor is used, connect the adaptor to the same USB port for every use. This will ensure that the COM number remains unchanged, avoiding the need to adjust the port advanced settings or reconfigure the Autronic software to use the new COM number.
2.
Do not make the serial connection between the PC and a powered ECU before the PC has finished its boot-up process. Many PC operating systems (including Windows versions starting with XP and NT) will interpret the data stream output from Autronic ECUs as being from a serial pointing device (i.e.: mouse). The PC serial communications port is then automatically configured for mouse use and will become unavailable for PC to ECU communication. Disconnect or power down the ECU, and then restart the PC to restore normal serial communication port functionality.
Notes:


© 2023 Aubert Electronics Pty Ltd